Circle of light
Combining my prototyping work with my tinkering, today I am going to share the process and the product of my latest project. This is the construction of a simple toy, a whirligig, with the slightly more complex addition of a red and blue light to make the toy more fun to play with!
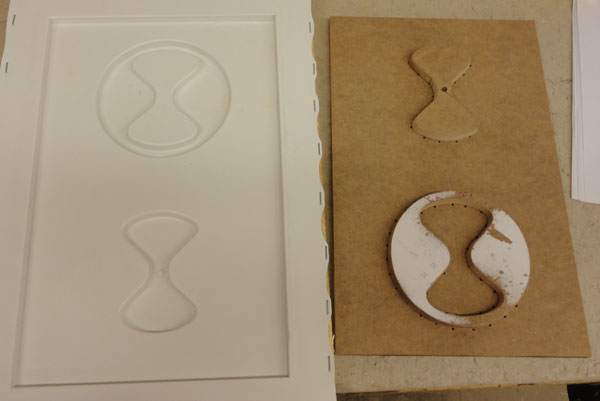
Given a pattern for the whirligig, the first step was to build the mold (seen on the right in the photo). This was done fairly quickly using a scroll saw and disc sander. Mounting those to an MDF base-plate and preparing vacuum holes along all the base edges, I was ready to vacuum form the mold. This was the first time I had ever vacuum formed anything and I used cheap, white styrene (seen on the left in the photo). Thankfully, it’s quite forgiving and I was able to re-melt the styrene and reuse it, despite messing up the first vacuum forming attempt.

Once the molding was complete, it was time to shape the outer circles and build in the electronic guts. Inside you will see two basic LEDs, wiring, a battery pack, two resistors and a switch with added weights.
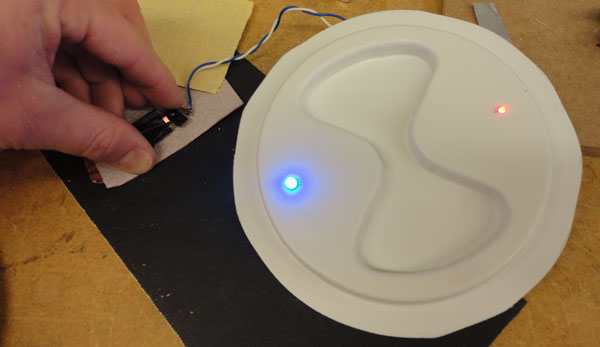
This is a super sensitive switch which just needs a slight touch to connect the leads. Adding weight to the switch and mounting it perpendicularly to the center of the whirligig allowed the switch to turn on whenever the device would spin. Packing and balancing the weight inside the device took some time, but eventually I had a simple plastic whirligig with LEDs activated by centrifugal force.
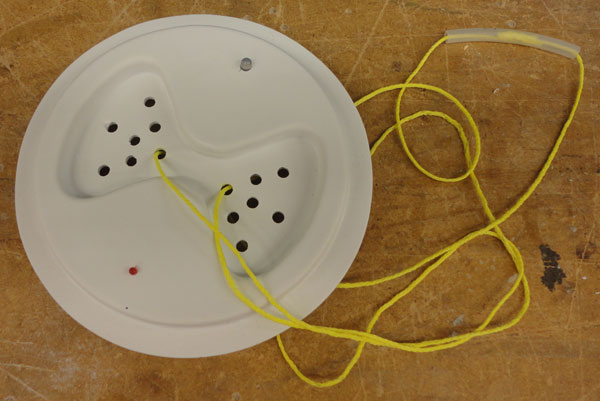
I had hoped that the high speed rotation and persistence of vision would allow the colors to blend visually into a purple, but as you can see the red and blue remain quite distinct. Still, it was a fun project and a fun toy to build!